Mold
mold - fidget spinner
PROMPT
We were tasked with creating an object via urethane casting. As a preview and comparison to injection molding, we were to create a silicone mold and cast a urethane part. The urethane casting was to be done with an open mold (no parting line).
PROCESS – research and sketch concepts
Initial research led me to a popular trend that was just beginning to go viral at the time. A fidget spinner fit the mold :) This is a toy object that people have in their hands when they get anxious or antsy throughout the day.
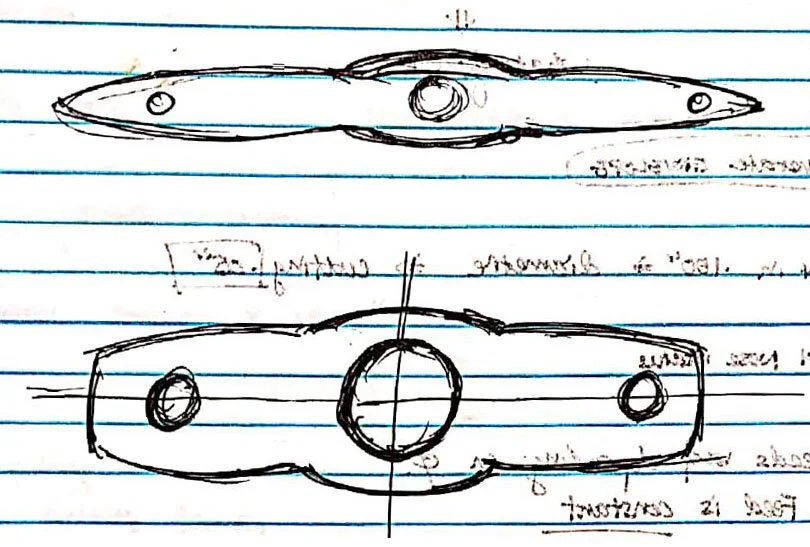
My original idea involved making a big multi-sided fidget spinner with a center hole to be ready to receive a bearing for spinning. Here you can see the initial brainstorming using sketching and 3D modeling.
PROCESS – Master Model – Design, Planning, CAD Development
Due to material constraints, I quickly pivoted to a two-wing or two-sided fidget spinner design. The mold frame was to be constructed with laser cut MDF (brown), with the common method of interdigitation press-fit to bring the sides together. I opted to also laser cut the original positive master part as well.
I was able to easily create small drafts using some sandpaper on the sides of the original positive. This original positive master part was then placed in the center of the cavity. How much space was needed around and above the positive master was determined by first finding out the part volume in SolidWorks and then modeling around the material. To err on the side of caution, I gave it a bit more material for the side walls by visual estimation.
Modeling clay was used to seal the joints of the structure and the master part to the mold base. Mold release was then sprayed for the easy removal of silicone after curing. The holes in the original positive would serve a few purposes later.
PROCESS –Mold Creation, Silicone
A two part RTV (Room Temperature Vulcanizing) silicone rubber formula was used, with Freeman addition cure silicon rubber V-340 as the base (A) and CA-45 (B) as the catalyst. The mixture was 10A: 1B and was weighed by volume. A giant vacuum chamber was used to degas the mixture. The negative pressure setting was 27-29 in Hg for at least 5 minutes or until most of the bubbles were gone. Once most of the bubbles were released and the material self-leveled, the mixture was taken out and poured into the MDF box with the positive. It was interesting to notice the color change during the curing of the silicone. After curing for 16-18 hours, the MDF framing was removed along with the master positive to reveal the mold.
PROCESS –Part Creation, polyUrethane
Freeman 1085 urethane casting (1 part resin to 1 part hardener) was used for making the actual fidget spinner body. After the formula was mixed, a combination of a few droplets of primary colored (red, blue, and/or yellow) dyes were mixed in to achieve the desired colors. This took some trial and error as the initial mixture is darker than color of the cured urethane. The solution was then poured into the previously made silicone negative mold.
PROCESS –Making the Fidget Spinner
Here is where the holes came in to play. The center and the two holes on the very outside acted as guide holes for drilling. The four square-holed pattern served as tooling holes to attach the fidget spinner body to a wood jig while the holes were bored out using a Forstner bit on the drill press. I ended up ever so gingerly sanding the holes to ensure the 608 bearing could be pressed in enough so that it would not detach from the body, but not so tight that the bearing would be hard to spin due the compression on the outer diameter.
PROCESS –Making the Fidget Spinner, Variations
For the green fidget spinner, I opted to put some other bearings on the sides. For the orange/red fidget spinner, I opted to turn down some brass round stock and pressed them into the side holes. Finally, for the yellow fidget spinner, I opted to just go with Phillips round head screws and nuts. I also decided to explore some other material to cast the part. However, these did not turn out so well in terms of rigidity (shown in dark green and clear without the bearing), so I abandoned that idea. The orange fidget spinner turned out to be the most fluid to spin. Something about the brass pieces weighing down each side made it feel balanced and easy to spin.
LEARNING AND TAKEAWAYs
Overall it was great to explore just a little bit of this method of manufacturing (liquid tooling) that set designers and costume and makeup artists use daily, as well as other professionals who uses it to create patterns and tooling. Silicone molding allows organic and delicate features to be produced, which I could have explored a little more. Undercuts still were limited though, as the actual material used for the part – urethane – was much less elastic than silicone.
Prototyping using RTV silicone rubber was process oriented as each step must be done carefully. The right amount of mixtures for the silicone mold and then later the urethane part itself must be carefully considered along with setting the chamber pressure correctly. Timing was important as well for curing. Also, too much molding material used means wasting material while too little molding material creates an incomplete or bad mold. It was instructive to learn how the surface tension of molding materials can trap bubbles easily, and thus degassing is required.


